

A 40-pin header does not make every Raspberry Pi HAT usable on an ArmSoM board. Power, pin assignments, multiplexing and driver expectations all need checking. Evaluate the specific HAT against the specific board revision before connecting it.
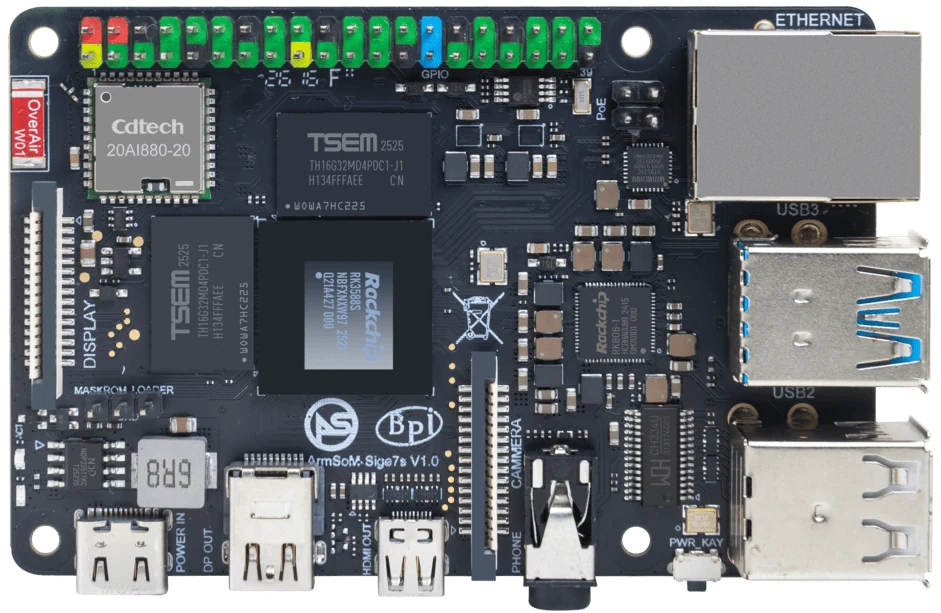
ArmSoM Sige7s
Create a signal-by-signal map
List every HAT pin used, including power, identification and control signals. Compare them with the target board’s documented header and electrical limits. Check software overlays and libraries separately. Begin with the minimum required connections on a controlled setup, and retain the original Raspberry Pi configuration as a reference when available.
Identify software assumptions
Some accessories depend on a Raspberry Pi-specific overlay, GPIO numbering scheme, boot configuration or binary package. Separate the underlying device driver from the vendor’s installation script. A standard I2C peripheral may be portable while its setup tool is not. Read the script and map each requirement to the target image.
Qualify one exact combination
Start with the simplest supported operation and then test startup, repeated access, error handling and reboot. Record board and HAT revisions, image, wiring and configuration. Publish a compatibility statement that names those components and the functions checked. Avoid turning one successful sensor reading into a claim that all HAT features work.
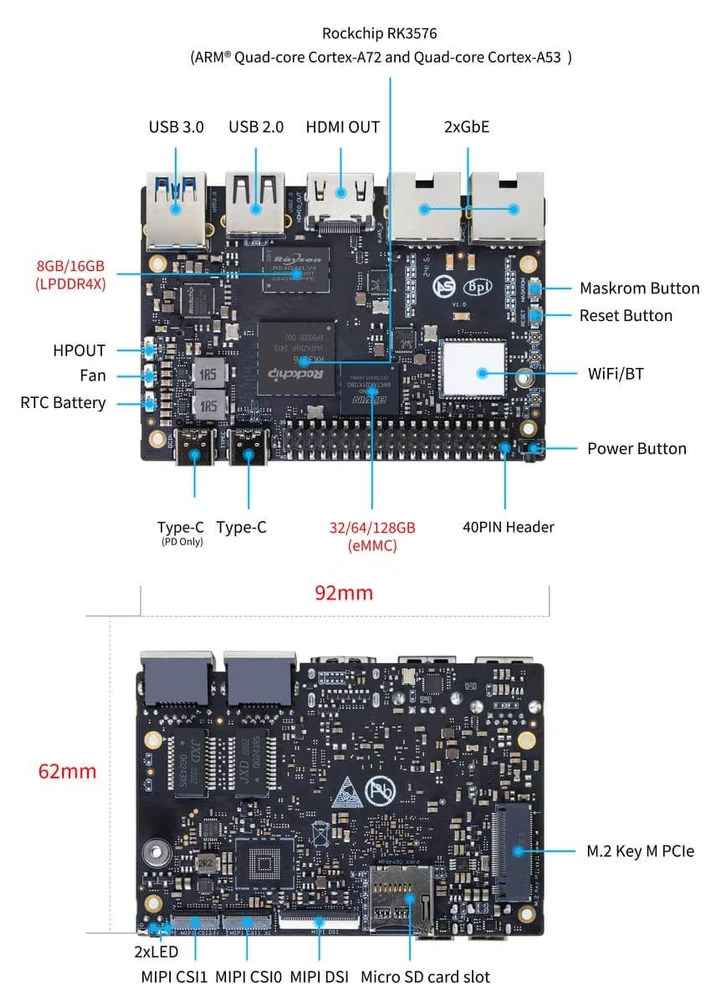
ArmSoM Sige5 board layout reference. Check the current manual before wiring a peripheral.
Match the choice to your requirements
Requirement or situation | What to evaluate | Decision detail |
Physical | Header position and clearance | Check enclosure and cooling. |
Electrical | Voltage, pin map and bus function | Resolve conflicts before power-on. |
Software | Driver, overlays and numbering | Reproduce each required function. |
Example design
A familiar header does not establish HAT compatibility
Before attaching a Raspberry Pi HAT to another board, compare every used pin and the supply requirements. Some HAT software expects Raspberry Pi firmware, overlays or a particular GPIO library. Start with the accessory’s circuit and software dependencies. Avoid applying power until voltage conflicts are resolved, and document any required adapters or software changes rather than calling the setup interchangeable.
Hardware and documentation
Sige7s · RK3588S
RK3588S, 6 TOPS NPU, Gigabit Ethernet and removable eMMC. Dimensions: 85 × 56 × 17 mm. Disconnect power before replacing eMMC.
Hardware documentation · Product details
Sige5 · RK3576
RK3576, four Cortex-A72 and four Cortex-A53 cores, 6 TOPS NPU, dual Gigabit Ethernet and M.2 PCIe 2.1 x1.
Hardware documentation · Product details
Frequently asked questions
Can a HAT work even if its installer only supports Raspberry Pi?
Possibly, if the underlying device and driver are portable. The installer itself may need replacement or adaptation.
Product information and support
Sources
Written by ArmSoM using the documentation below. Example designs are proposals, not measured customer installations.